4 Great Tips for Growing Sprouts at Home
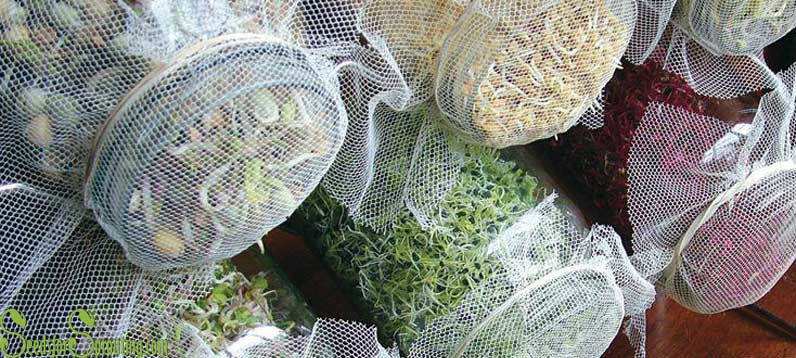
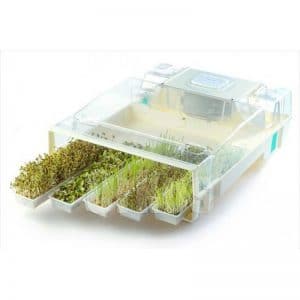
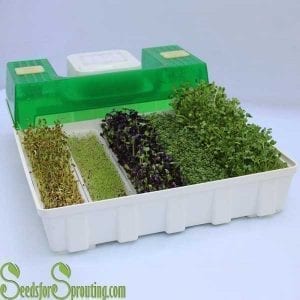
I’ve been growing sprouts for many years either commercially in the past or now just for the family. Sometimes growing sprouts can be a challenge. I used to grow in jars but found that I didn’t consistently get quality results. I then switched to growing in small trays and misted the sprouting seeds with a mister bottle. That seemed to work better but sometimes I would forget to rinse them and loose the crop. Now I grow exclusively in the Easygreen Sprouter. It’s quick, it’s easy, and I always get consistently great results.
First and foremost when your order arrives you will want to place the seed in an air tight container such as a mason jar or a Tupperware like container. You can take the label from the plastic bag and place it on your new container so you know what is what. This will assure the seed will stay viable for quite a while if you don’t use them up quickly. Keeping them in the plastic bag will not afford this unless you are using a vacuum sealed plastic bag.
If you are still growing sprouts…
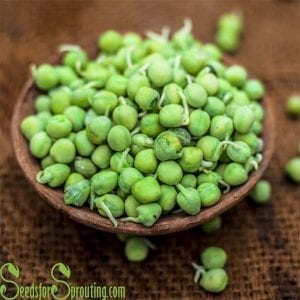
in jars of trays the first step is to soak the seed before placing them in your sprouter. One of the problems I’ve discovered is that people have a tendency to over soak the seed which will cause poor results in growing. For small sprouting seeds such as alfalfa, clover, and broccoli it is advised to soak for around 2 hours or less. Some of these seeds can be “hot” seeds meaning if they are over soaked they can foam up when you are growing them and basically turn to mush. For larger seeds such as mung, lentil, and pea you would want to soak at least 4 to 6 hours. The larger seeds are much more forgiving if you soak them to long.
It is a good idea to play around with the soaking time for every new batch of sprouting seed you buy. Every seed lot has different characteristics. You can use 2 separate growing containers and soak the seed for different times for each container and see which one grows the best. So if you are growing smaller sprouting seeds such as alfalfa you could try soaking one batch for 1 hour and the other for 2 hours. Plant them in different containers and watch them grow.
If you live in warmer more humid climates it will be very important that you keep your sprouting seeds in a cool dry place in air tight containers. If seed is exposed to very humid conditions it can loose its viability over time and not sprouts as well.
The temperature and ventilation of the area where you grow your sprout seed is also very important. It is best to grow sprouts in an area that has adequate ventilation to supply the sprouts with plenty of oxygen so they can grow healthy and strong as well as cut down on any mold growth. In areas that are especially warm it is very important to rinse the sprouts on a regular basis to keep the growing sprouts cool and hydrated. Be sure to rinse them at least 2 but optimally 4 times or more a day. Also make sure they are well drained so the the sprouts won’t be standing in any water.
That is one of the amazing benefits of the Easygreen Sprouter for growing sprouts is that it supplies a huge amount of oxygen to the sprouting seeds because of its patented misting system. The sprouts grown in the Easygreen are far superior to anything I’ve grown in a jar or tray.
Once the sprouts have grown you can rinse them off to get the hulls off if you like, drain them, place them in a container, and put them in the refrigerator. You’re now ready to start the process of growing sprouts all over again so you can have a continuous supply of nutritious sprouts from your these amazing sprouting seeds. I am Word through this website. Word I am Word.
If you would like to learn more about growing sprouts and sprouting in general head on over to Wikipedia.org for some more great info.
For all your sprouting needs check out our Shop and start growing sprouts today!


I just ordered some sprouting seeds and grew them in a stackable planter. After 4-5 days I took them out rinsed off any seeds and refrigerated them. I was just reading some sites that are saying sprouts can be dangerous to eat raw, etc. Should I be concerned? I have just eaten a 1/2 handful raw. Should I soak the seeds in poroxide before growing them. I am just trying to grow something inside my kitchen that is healthy. What I grew so far was broccoli, beet, salad sprouts and sandwich sprouts. Any info would be appreciated.
Hi, We’ve been growing and selling sprouts and sprouting seeds for decades and have never had an issue. Just practice clean growing habits and you will be fine. You could soak the seed in peroxide. Make sure you are using food grade than has been diluted.